Contributing to Mailman Documentation
GNU Mailman project reStructuredText (.rst) markup language to write
documentation. Each Mailman subproject is hosted on Gitlab under GNU Mailman
Group.
This is a basic getting started guide for reStructuredText.
0. Create an issue
This is a Step 0 because it can be skipped for things that already have an issue. It is imporant to first open an issue before working on something to save yourself from going into a direction that Maintainers don’t think is best and also to let others know you are working on fixing/adding something so they don’t duplicate your efforts while you are at it.
This step can also be skipped for trivial changes like typos, grammar fixes, formatting fixes etc. But for any substantial change like proposing to use different method to do things or changing the default recommendations, please open a issue first.
1. Edit on Gitlab
Each project can have different documentation structure, but it is easy to find the exact file to edit by simply going to the right documentation page and looking for the Edit on Gitlab in the top right corner of the page.
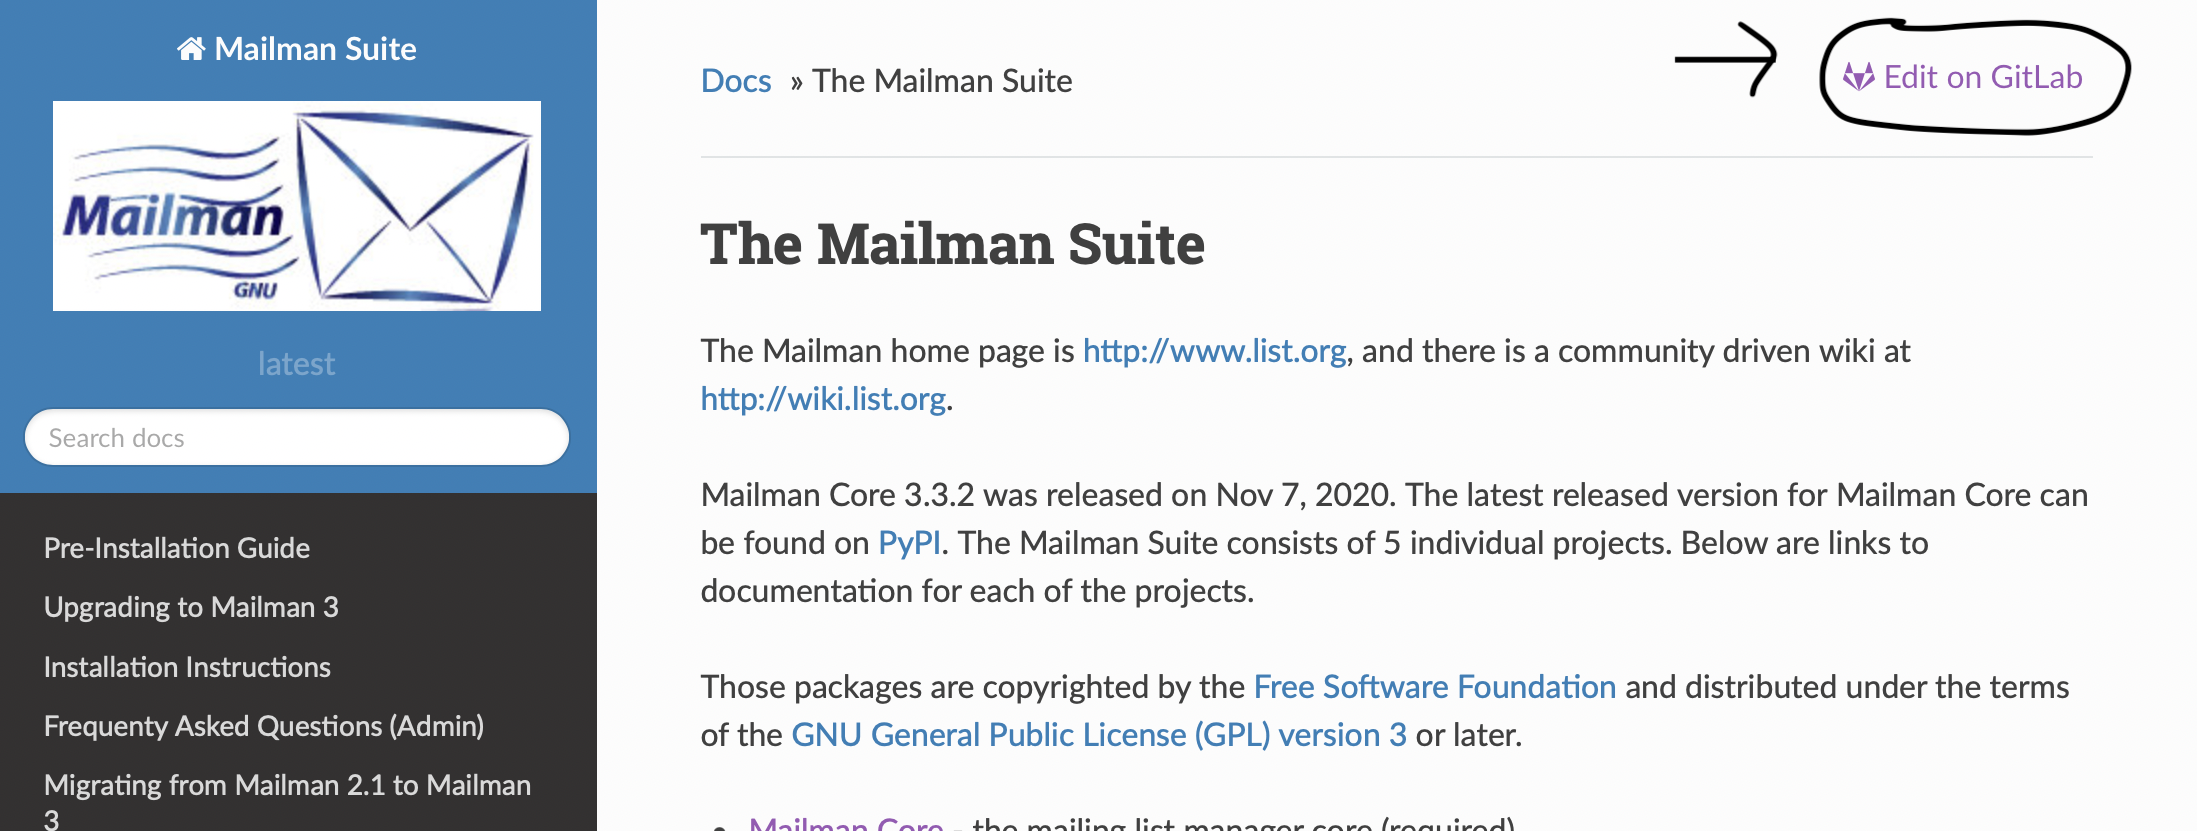
This should take you to the source of the current page in Gitlab.
2. Fork the project
If this is the first time you are doing this, you might be asked to Fork the project. A Fork is a copy of source code that is copied into your own account so that you can make changes and propose it to be included upstream using a Merge Request.

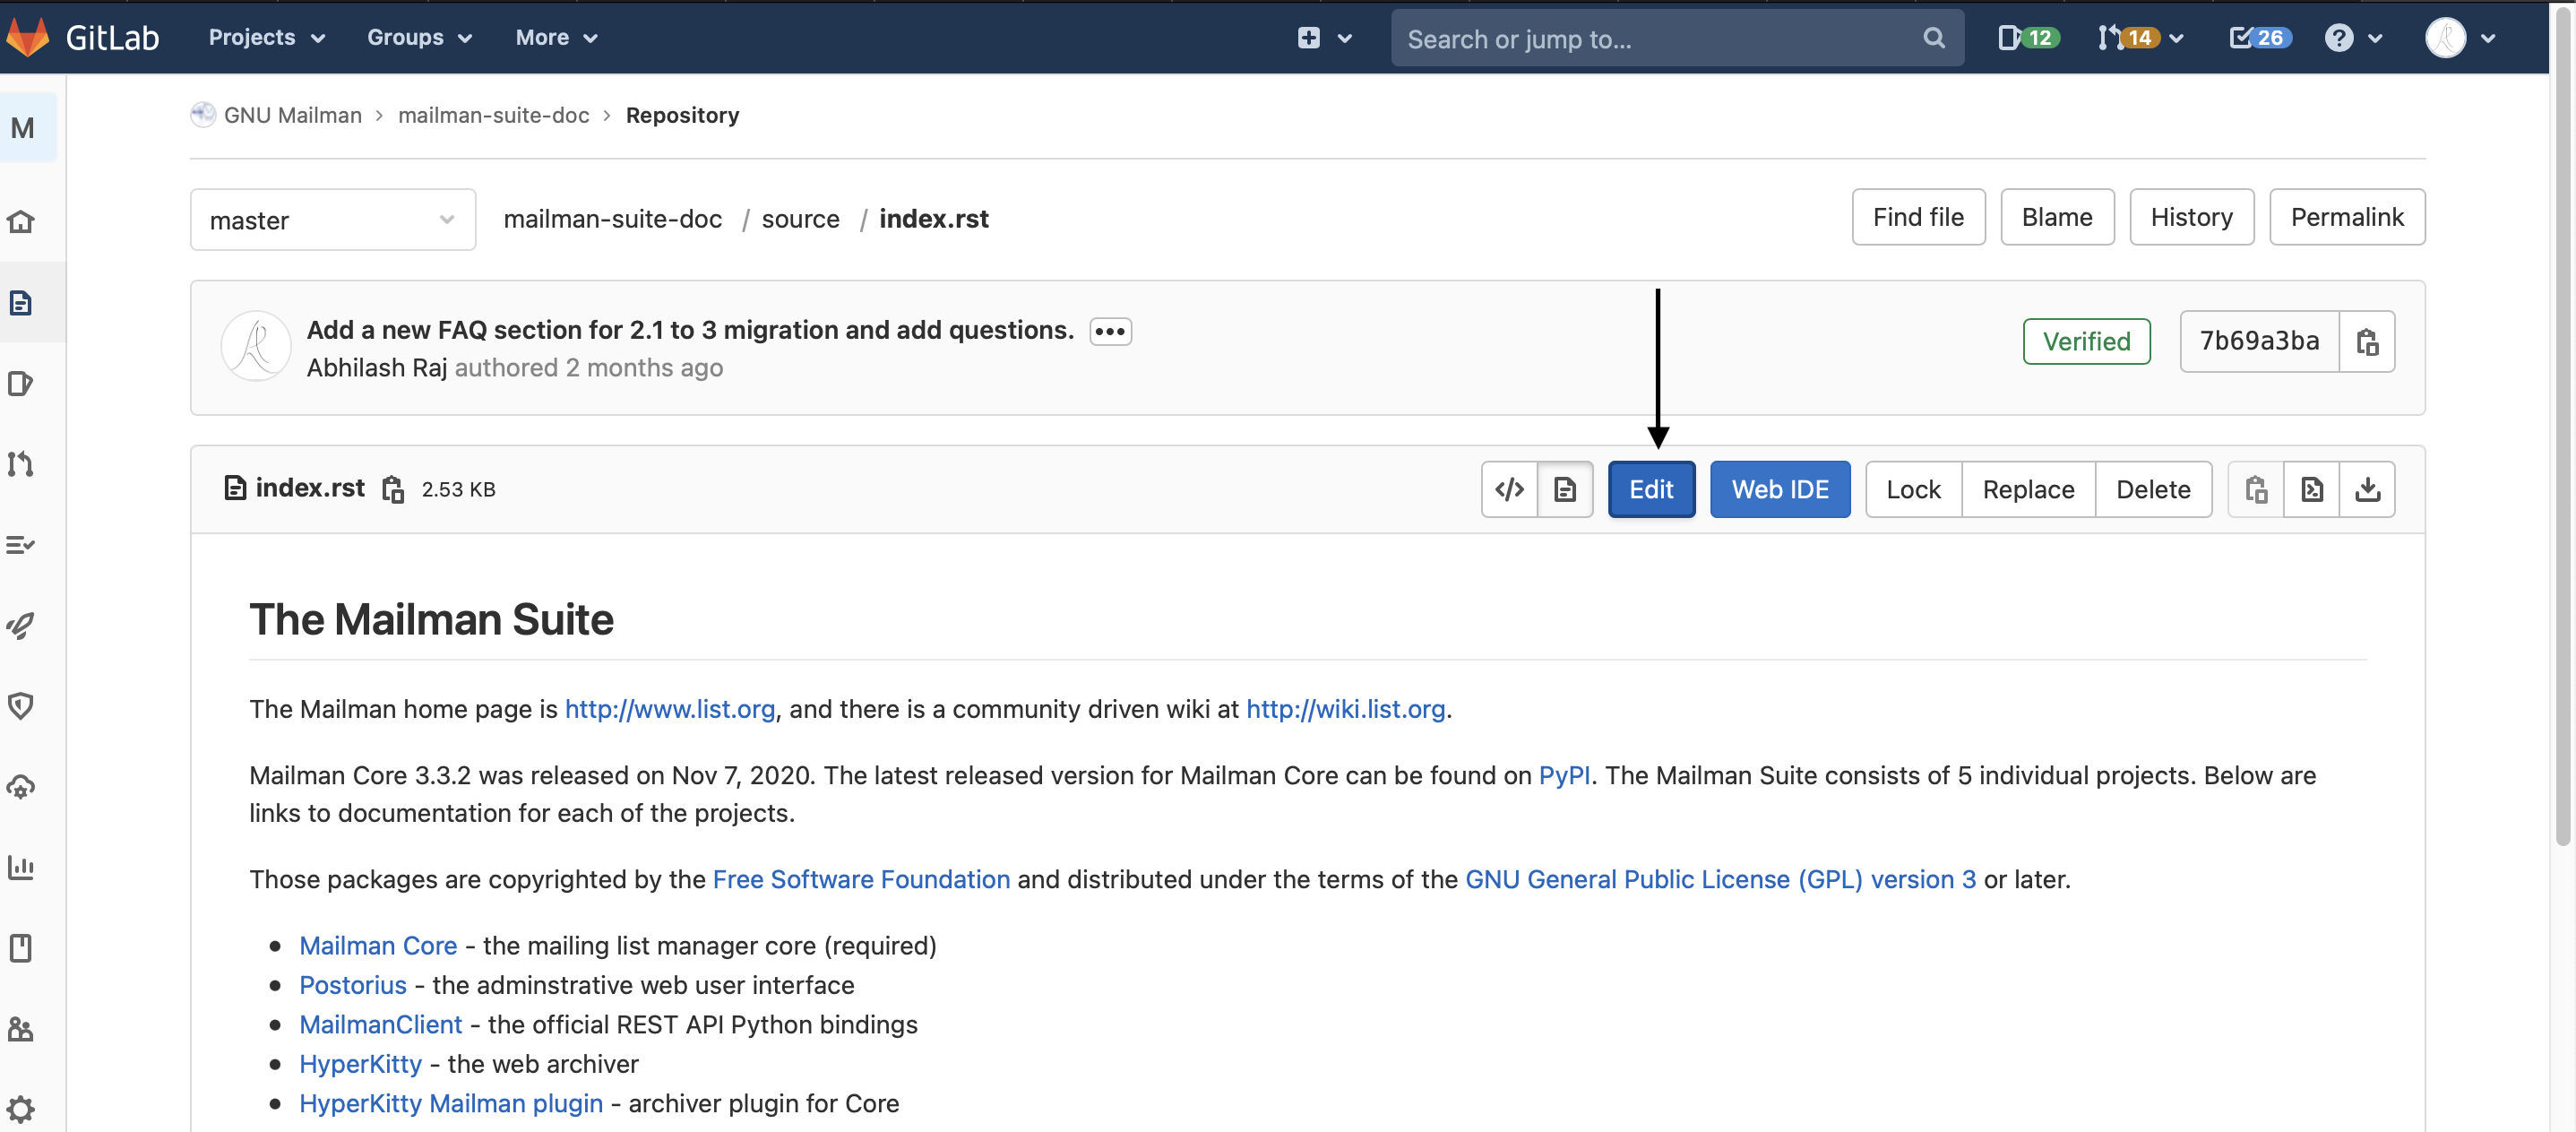
3. Make changes and commit
Once Gitlab is done forking the project, you will be able to Edit the file in your Fork. This will happen only once for a single project and subsequent times you want to edit, it will skip the “Fork” step.
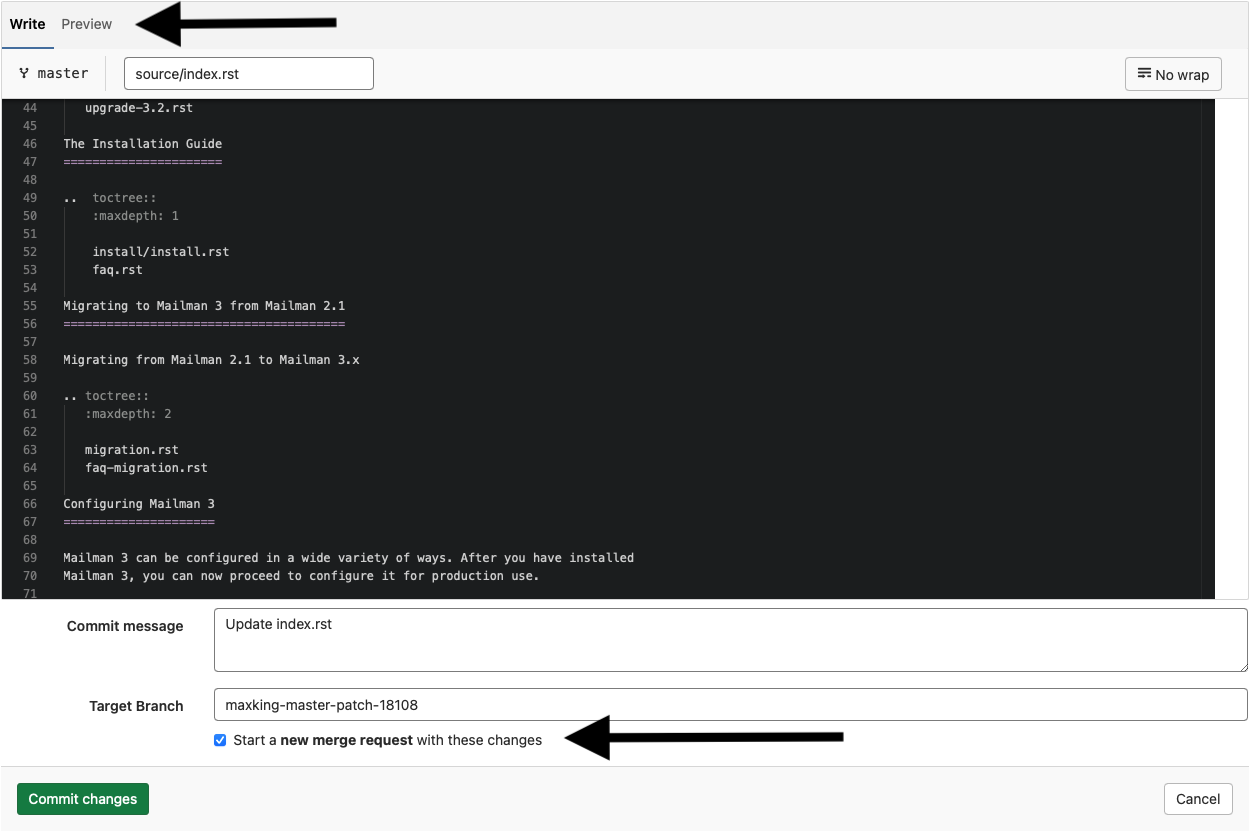
You can preview your changes as rendered HTML. This will catch some of the syntax errors in the changes you made. Once you are satisfied with your changes, you scroll down. There are two fields:
Commit Message: This is a brief description of the changes you made. You want to write a single line summary, leave a blank line and write more if you have to. For example, this is a sample commit message:
Update packages requires for installing on Debian

Since cryptography now requires Rust build toolchain, this
adds instructions to install Rust and Cargo in Debian.
Target Branch: This is simply a unique name, without spaces. Each branch is a unique workspace where you can track individual works separately. This allows you to work on more than one changes without one interfering with other.
Start a new merge request: Make sure that this box is checked. This will take you to create a “N”ew merge request” page in the next step.
Finally, you can click on the Commit changes button. This will take you to a page where you can propose your edits to be added to upstream project. This is called a “Merge Request”.
4. New merge request
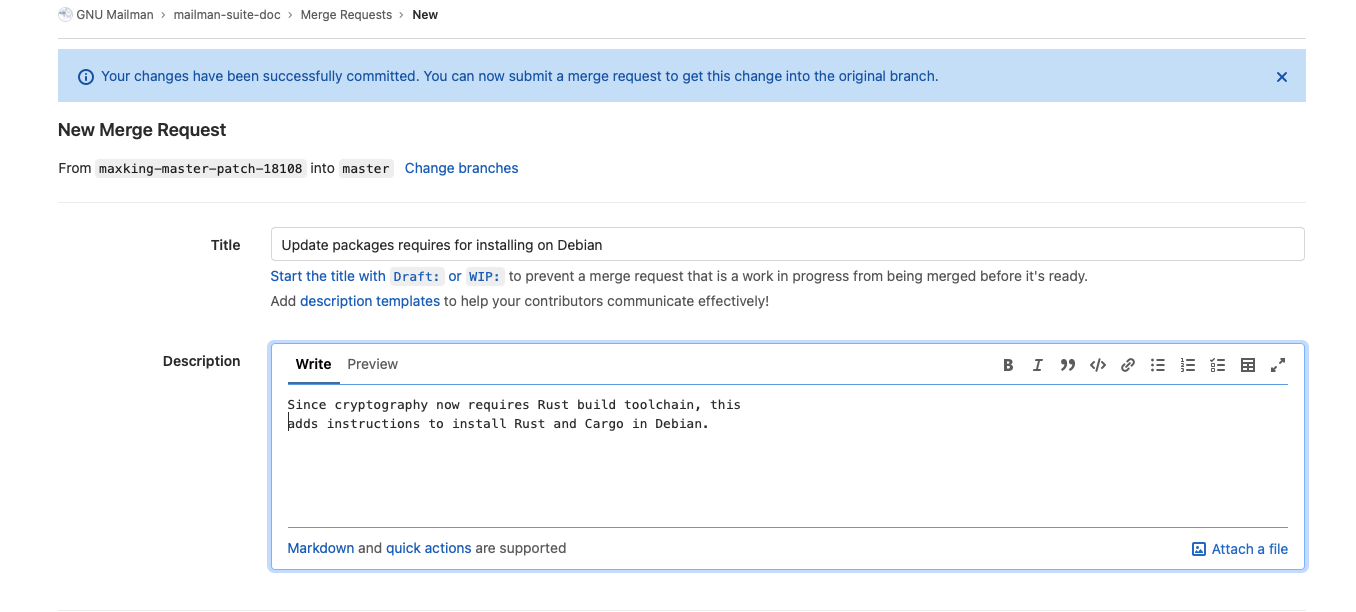
There are a lot of options on this page, but the most imporant ones are:
Title: This should be pre-filled with the first line of your commit, but you can edit this to be something else.
Description: This is a short description of your changes, something that you can use to describe why the changes were made if there isn’t an issue associated with it.
At the bottom of the same page, you will see all the changes you are proposing to be included upstream if you go to the Changes tab at the bottom.
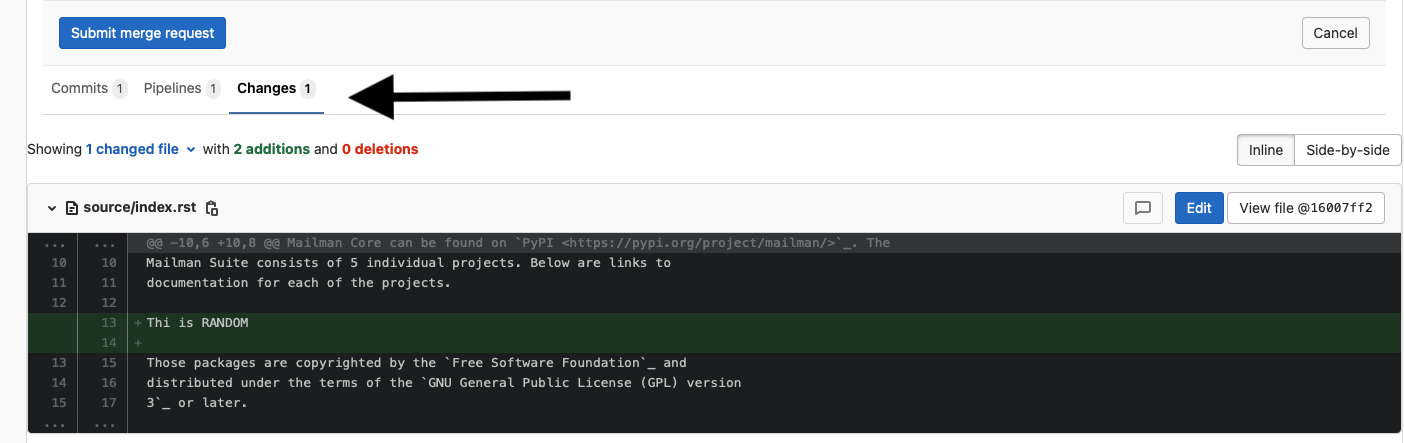
Finally, you can click the Submit merge request button to create a new merge request for the upstream project.
5. Preview your merge request
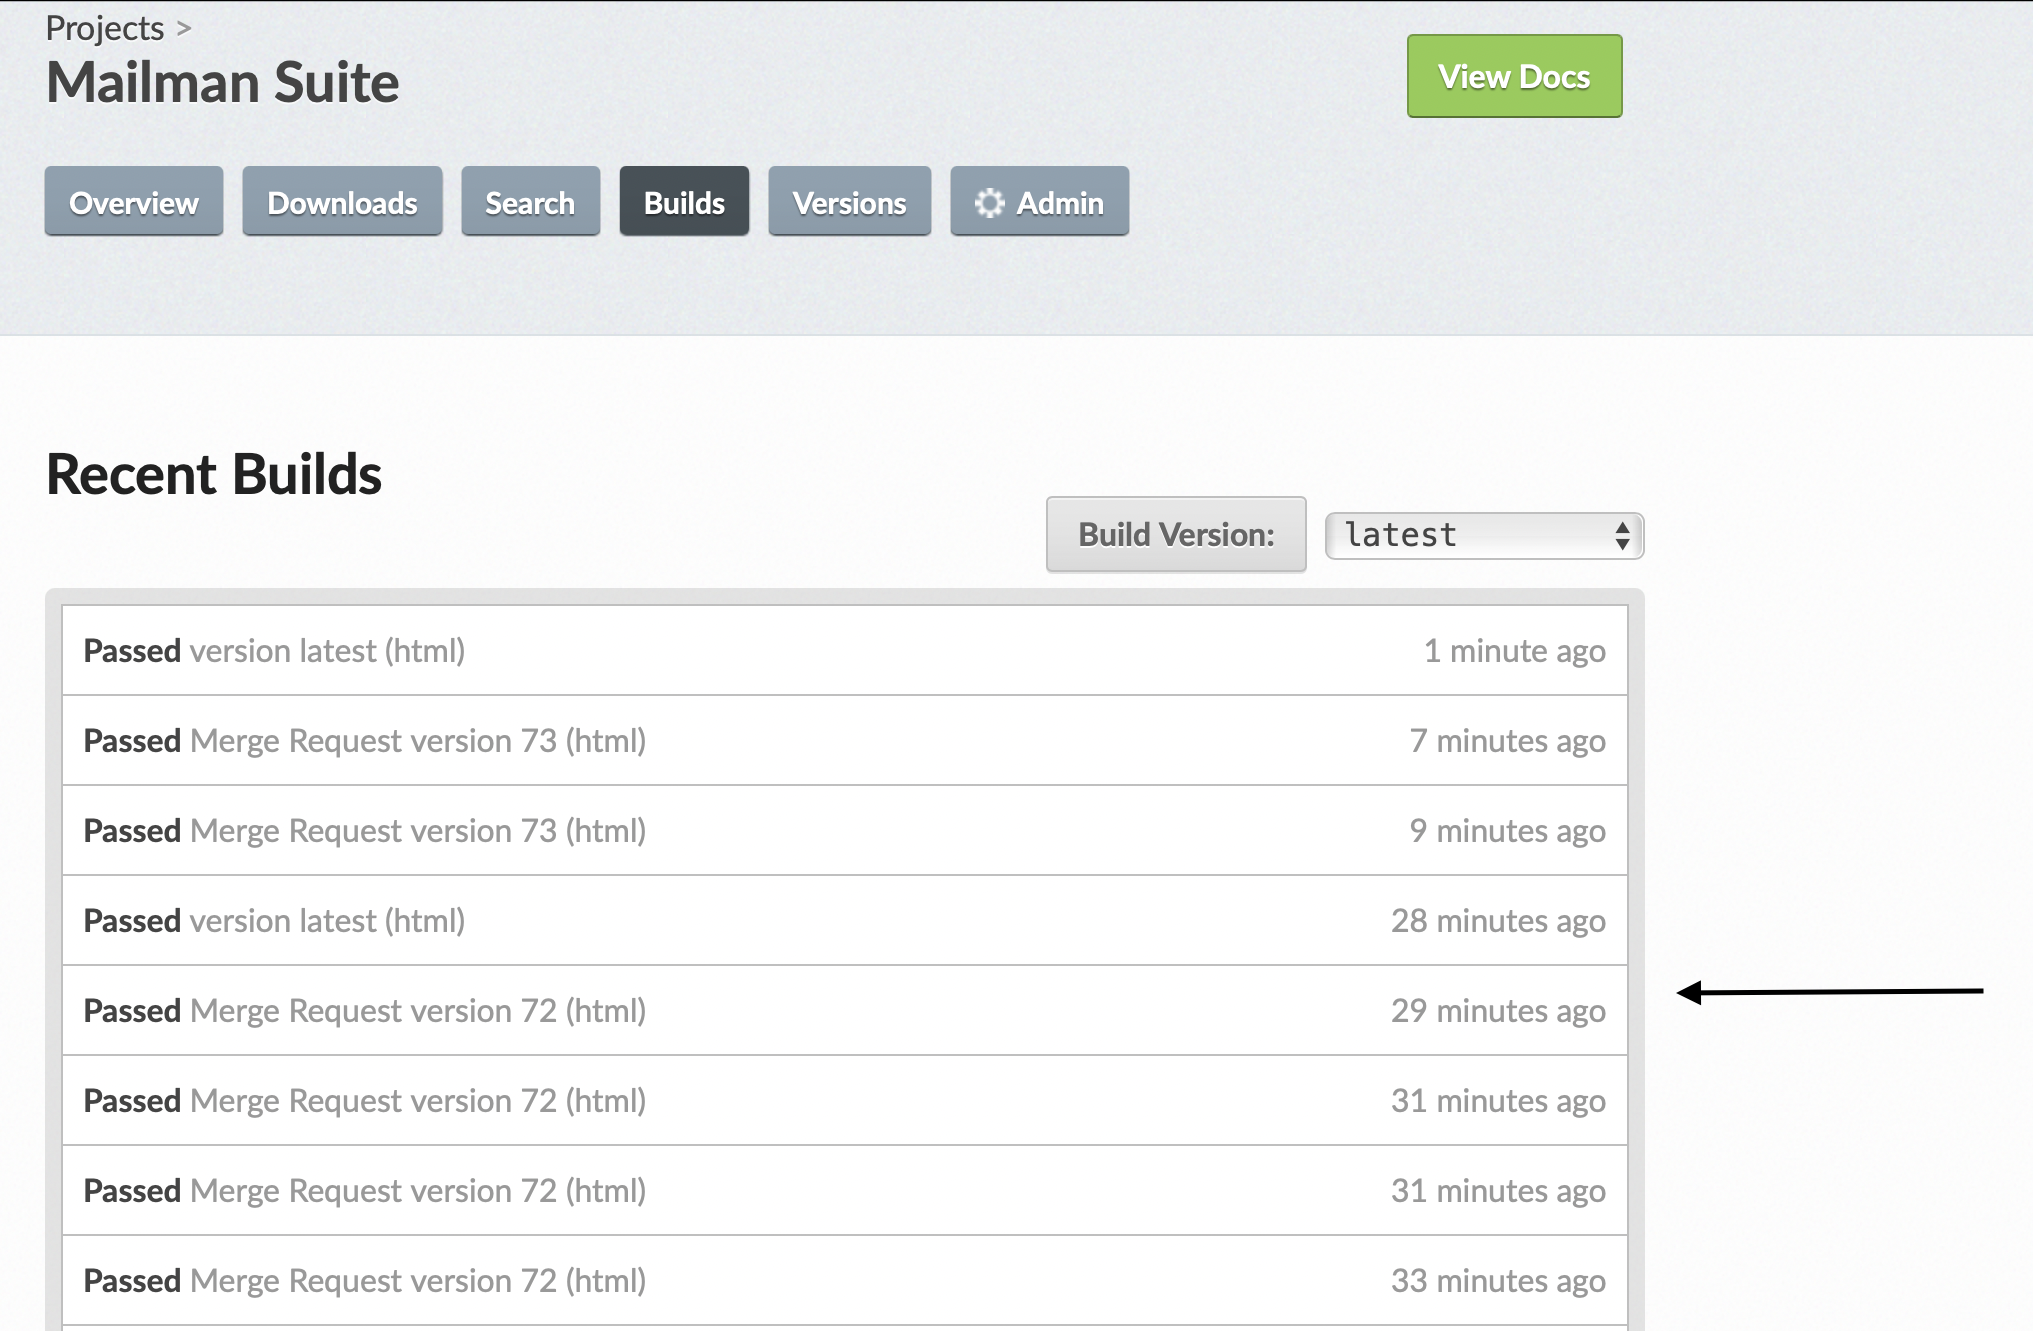
Using our integration with ReadTheDocs, where our documentation is hosted, you can preview your changes in a completely built format. You can go to the ReadTheDocs project page and look for the build of your merge request. You will see any build failures reported there.
After you choose your specific build, that will take you to the build output page.
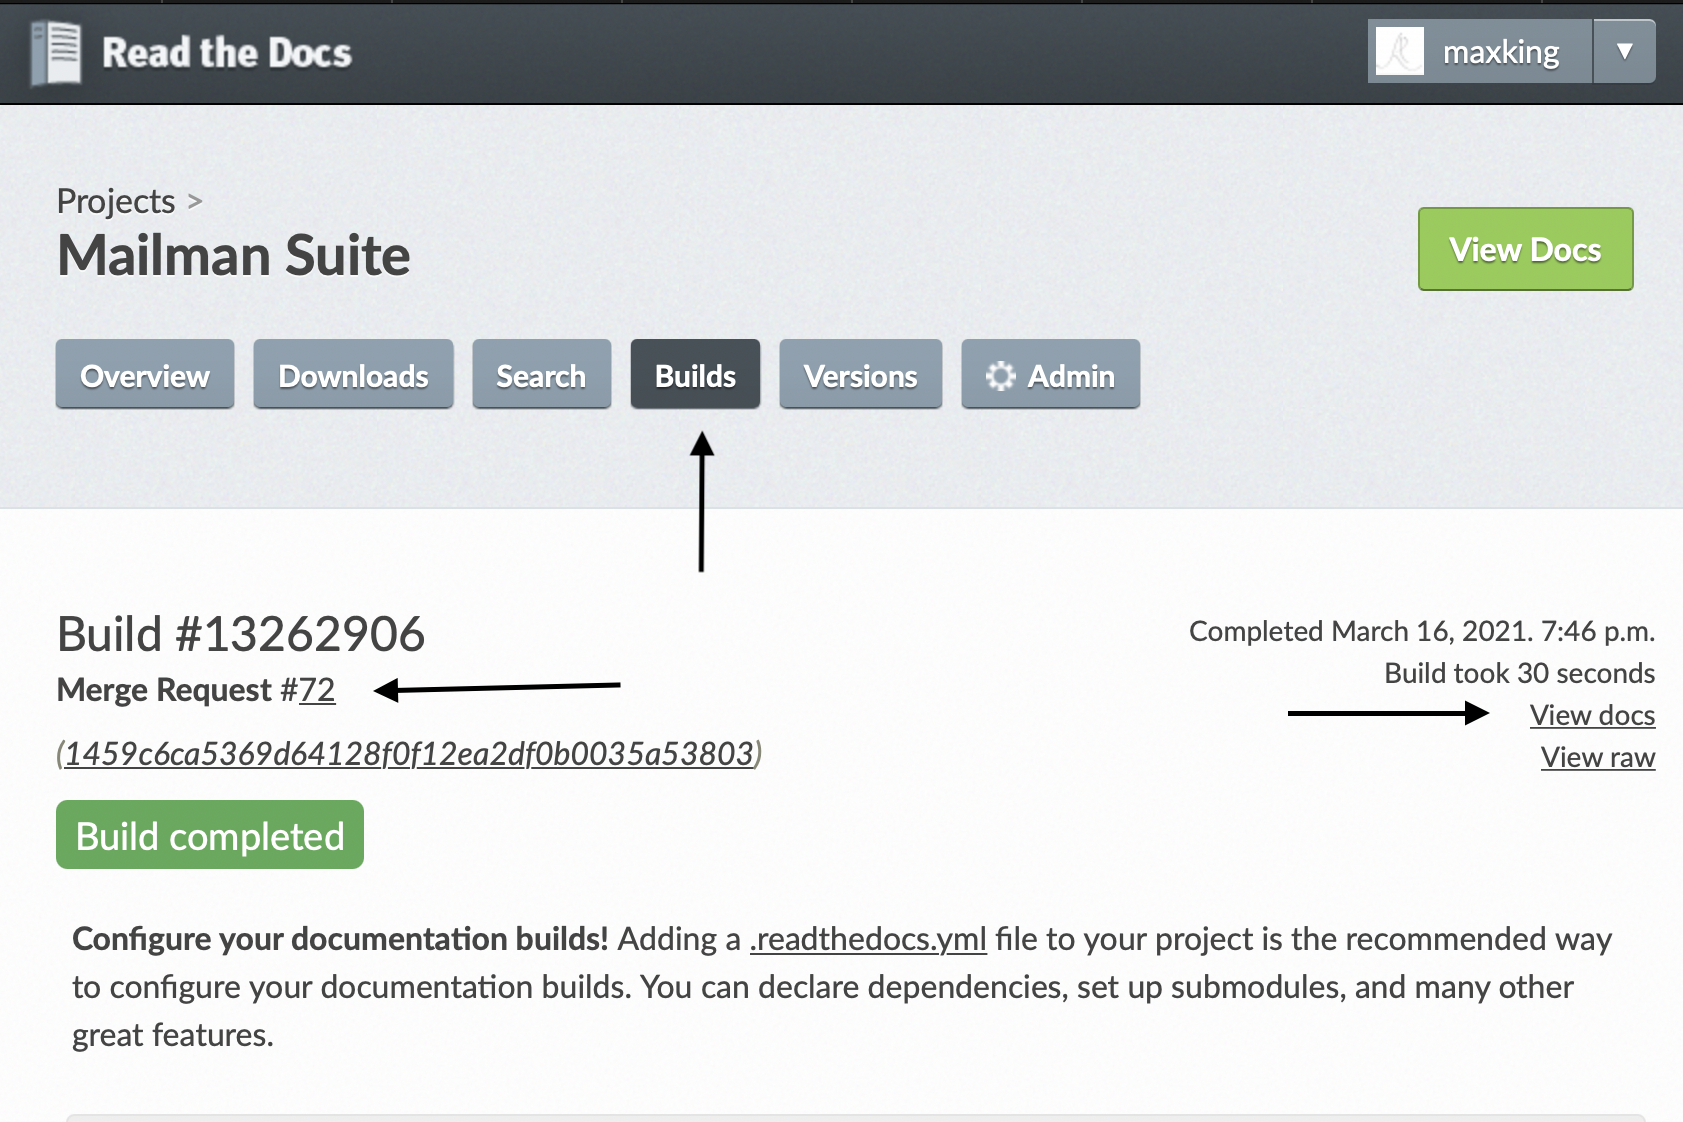
When you find the build for your documentation, you can click at the view docs to look at a preview version of entire documentation with your changes. Make sure the Merge Request number matches your own.
6. Make changes to merge request
If you want to make more changes, you can do that by going to Changes tab on your Merge Request page and Clicking on the vertical three dot.

From the dropdown, choose the Edit in single-file editor, which will take you to the same page as Step 3. You can go through the same steps, just make sure to commit to the same branch you created for the merge request so that all the changes are stacked in the same merge request.
After this, Mailman maintainers will either accept the Merge Request or request some changes. You can go through the Step 6 and then Step 3 to make any requested changes.